TP-Link Archer AX10 Login: Admin Setup Guide

I opened the login page for the Archer AX10 and waited for the usual username…
I opened the login page for the Archer AX10 and waited for the usual username and password boxes. They never came.
The page asked me to create a password instead. This guide explains the first-setup login for the Archer AX10 and the steps I use to get into the admin panel.
There is no default password for the Archer AX10 — you create one during first setup. Log in at 192.168.0.1 and set your password on the first screen.
The fastest way in: tap the button below, then sign in with the details in the box.
IP Address: 192.168.0.1
Username: None
Password: No default password — created during first setup
The button opens our 192.168.0.1 login guide — the direct login button there takes you straight to your router’s sign-in page.
TP-Link Archer AX10 Default Login Details
I checked these defaults against the Archer AX10 setup flow, so the table below matches the router in front of you.
There is no factory password for the Archer AX10. The password you create at first setup becomes the admin password.
| Detail | Value |
|---|---|
| Login IP | 192.168.0.1 |
| Username | None |
| Password | No default password — created during first setup |
| Admin URL | tplinkwifi.net |
How to Log In to the TP-Link Archer AX10
I use the same order every time, because the order keeps a login from going wrong. If one step stalls, the TP-Link login guide covers the same flow for the whole brand.
- Connect your computer or phone to the Archer AX10 with an Ethernet cable or over Wi-Fi.
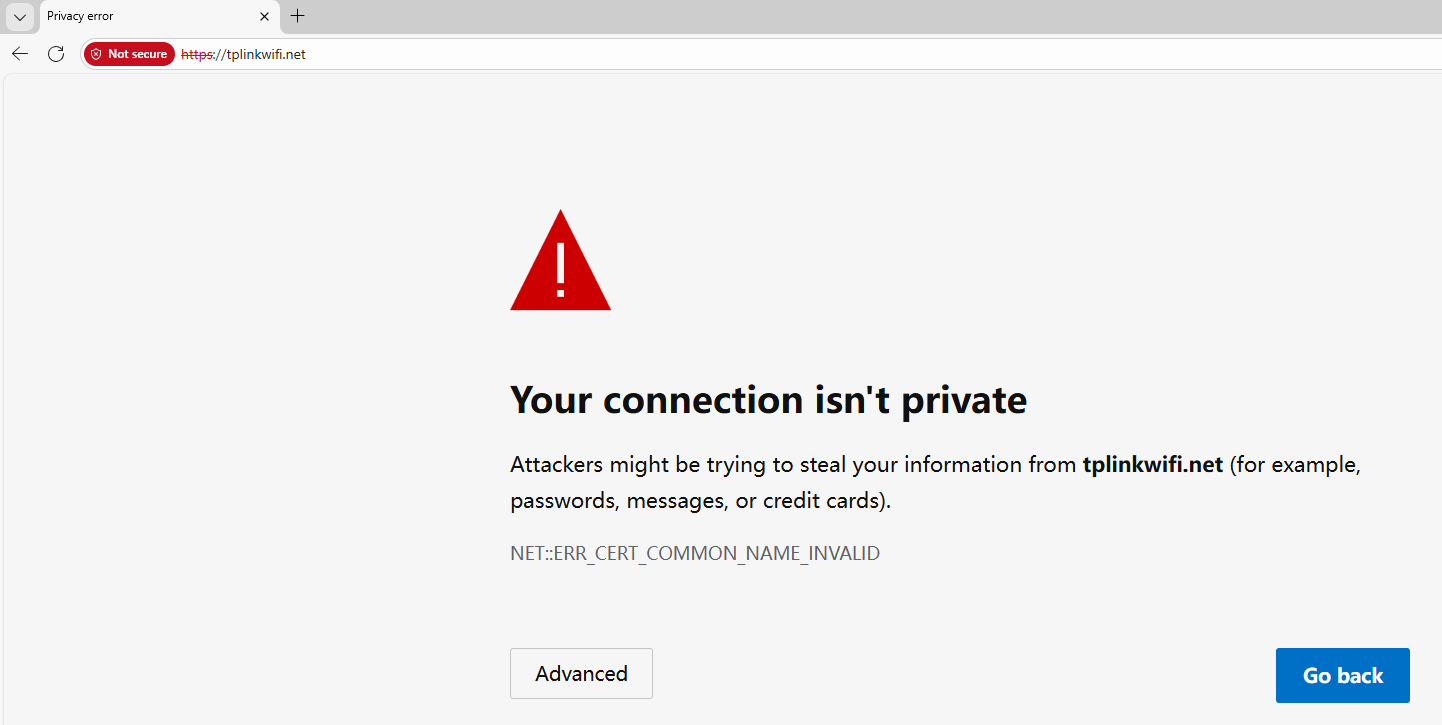
- Open a browser and go to 192.168.0.1. You can also open tplinkwifi.net, which takes you to the same login page.

- The first screen asks you to create a password — type one you will remember, then confirm it.
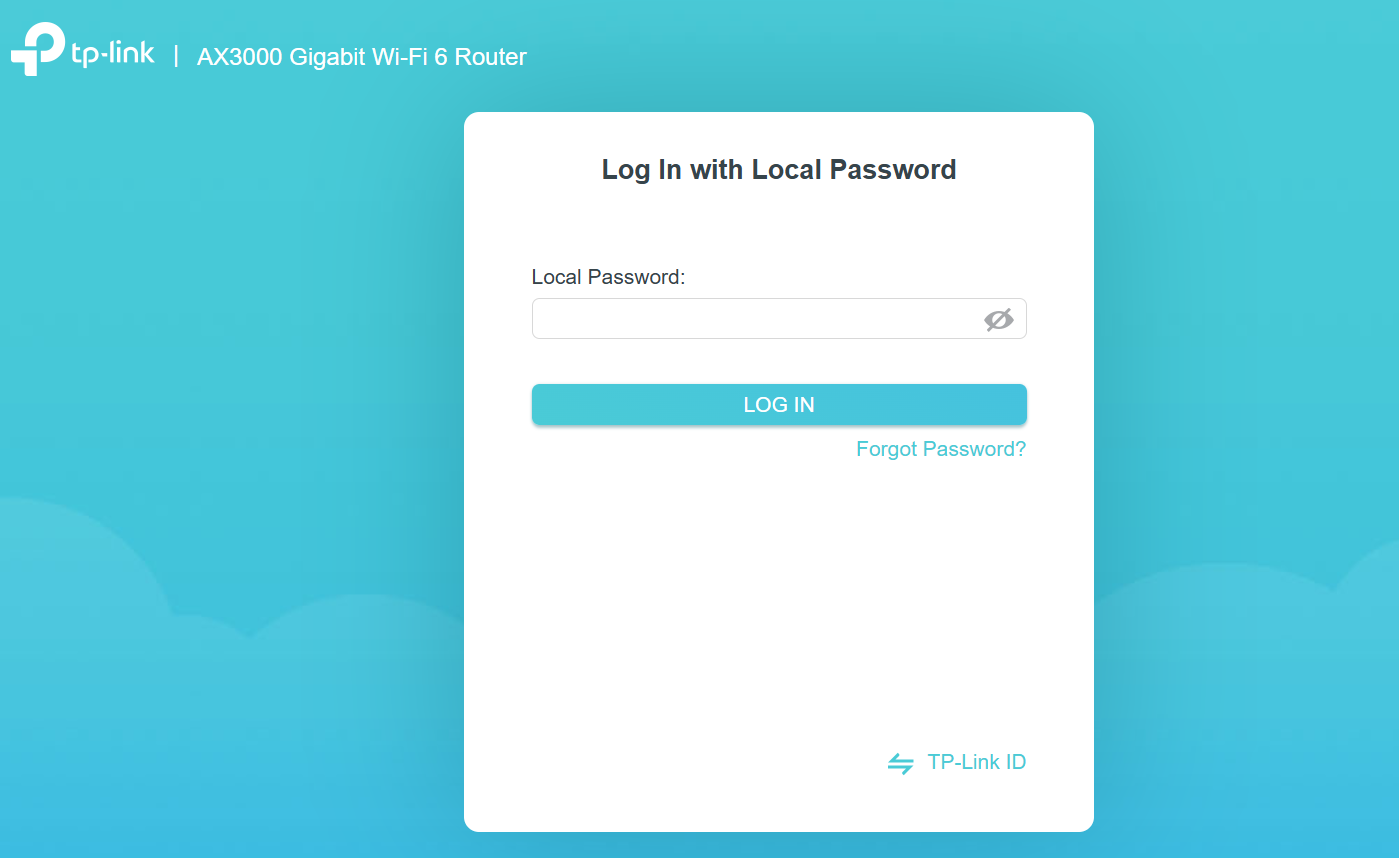
- Continue past the setup screen. The admin panel opens.
- Write the password down somewhere safe.
Default Username and Password — All Variants
The same model can ask for a fixed password on one firmware and a created one on another, so check which case matches your router.
| Version | Username | Password |
|---|---|---|
| Archer AX10 | (none) | No fixed password — created during first setup |
If your Archer AX10 was set up before, the password is the one created at that first setup.
Change WiFi Password and Network Name
I change the Wi-Fi password first on every router I set up, because the factory password is the same on every unit that leaves the shop.
Once you are logged in, changing the Wi-Fi details takes about a minute:
- Log in at 192.168.0.1 with the password you created at first setup.
- Open the Wireless settings section of the admin panel.
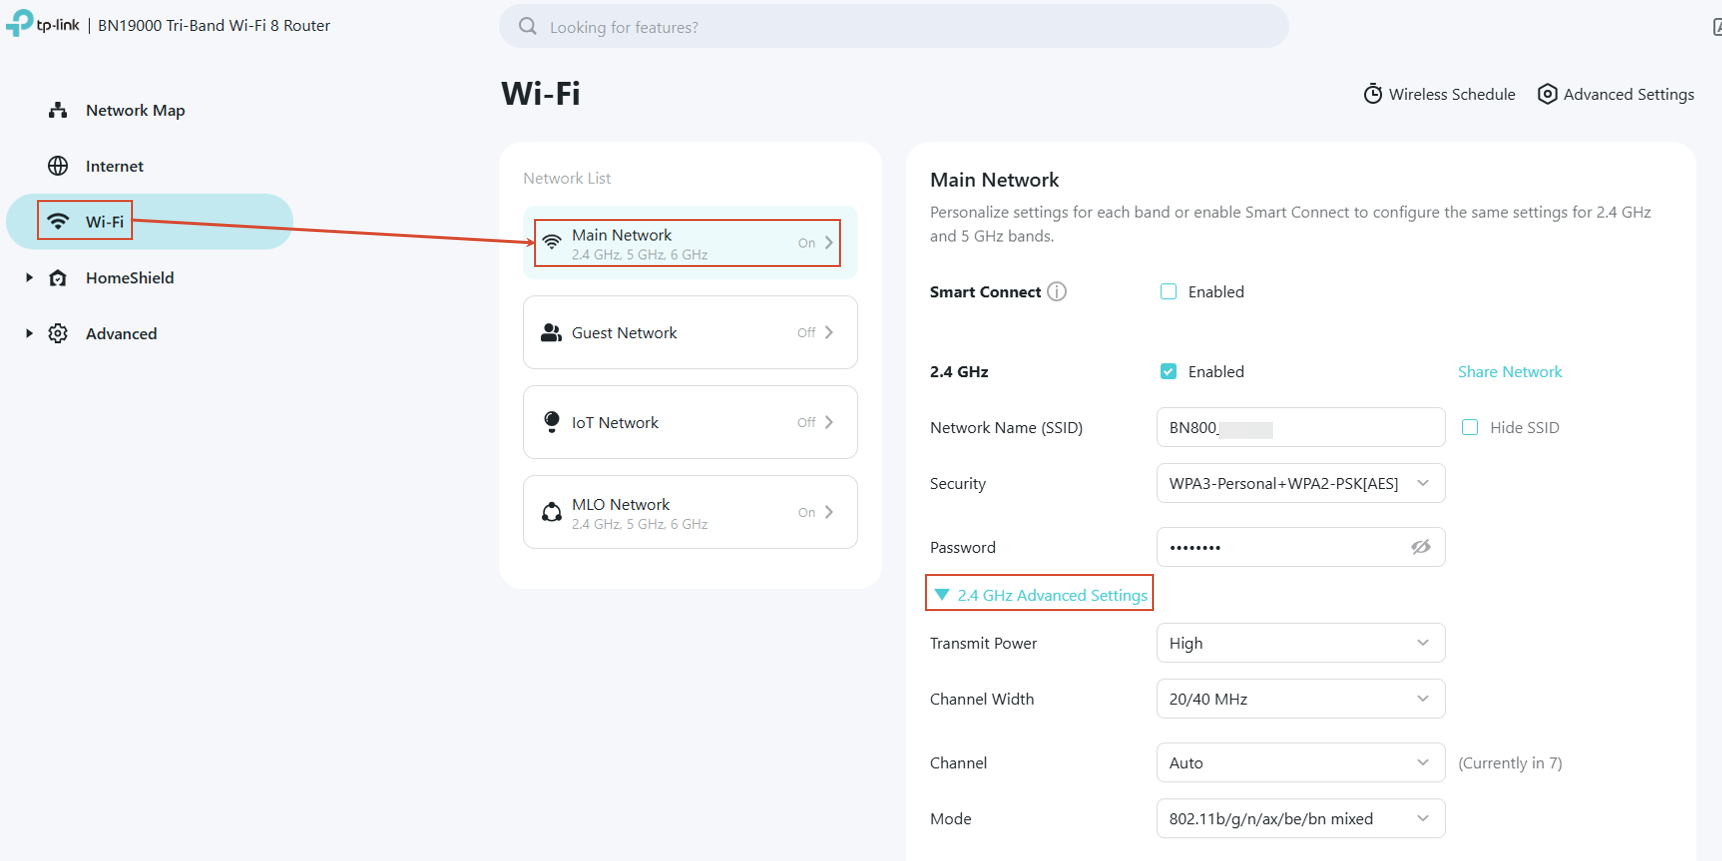
- Change the network name (SSID) for each band, or leave it as it is.
- Type a new Wi-Fi password, then save the settings.
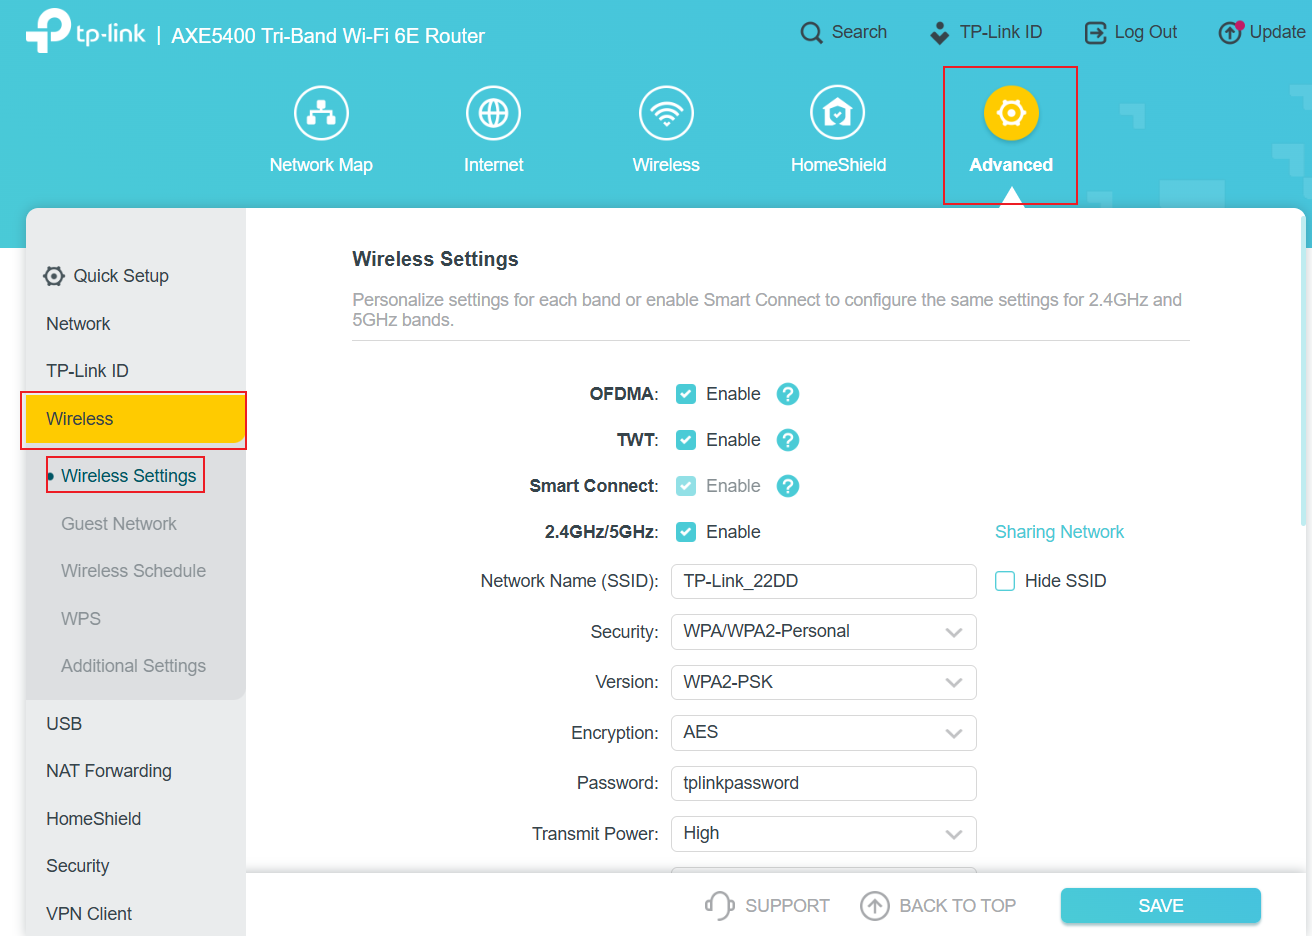
- Reconnect your devices with the new password.
Use a password of at least 12 characters, with letters and numbers mixed in.
Login Not Working?
I start with the connection itself, because that is where most login failures begin, and I work through the list in the order it is written.
If the login page will not open or the password is rejected, work through these fixes:
- Make sure your device is on the Archer AX10 network, not on mobile data or another Wi-Fi network.
- Type the address exactly: 192.168.0.1. Try tplinkwifi.net if the IP does not load.
- Try another browser, or clear the cache and try again.
- Check Caps Lock is off, and type the password exactly — passwords are case-sensitive.
- Restart the router: unplug it, wait 30 seconds, and plug it back in.
If you still cannot log in because the password was changed and forgotten, reset the router to factory settings: Press a pin into the recessed Reset button and hold about 10 seconds until the LEDs blink.
After the reset, log in again, create a new password, and set the router up from scratch.
Key specs: The TP-Link Archer AX10 is a WiFi 6 (AX1500) router.