192.168.0.1 – Admin Login & Router Setup Guide 2026
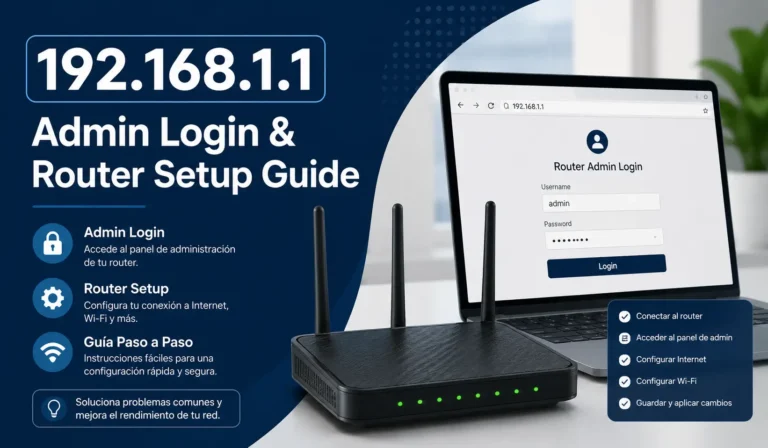
192.168.0.1 is the default gateway address that gives you direct access to your router’s admin panel. If you have ever needed to change your WiFi password, block a device, or update your network settings, this is the address that makes all of that possible.
Type it into your browser’s address bar, log in with your credentials, and every setting your router has is right there waiting for you. Whether you are setting things up for the first time or troubleshooting a problem, knowing how this address works saves you a lot of time.
192.168.0.1 IP Addresses
Most people never think about the numbers running their home or office network until something breaks. The IP address 192.168.0.1 sits quietly in the background, acting as the default gateway that keeps everything connected.
Broadband routers from brands like Netgear and D-Link have been shipping with this address baked in for years. It belongs to the Class C private network range, running from 192.168.0.0 all the way to 192.168.255.255 a range carved out specifically for smaller private networks when RFC 1918 defined the boundaries between public networks and private networks back in the 1990s.
Here is how the three private network classes break down:
| Class | IP Range | Designed For |
|---|---|---|
| Class A | 10.0.0.0 – 10.255.255.255 | Large networks, multinational companies |
| Class B | 172.16.0.0 – 172.31.255.255 | Medium-sized networks, universities |
| Class C | 192.168.0.0 – 192.168.255.255 | Smaller private networks, home routers |
When your device joins a network, the router assigns it an address from the 192.168.0.X pool, where X is a randomly assigned number. Your laptop might get 192.168.0.2 while your phone lands on 192.168.0.5.
The router itself sits at 192.168.0.1, acting as the doorway between your local network and the broader internet. Type that address into your web browser’s address bar and the admin panel opens up ready to let you modify credentials, create networks, update firmware, and simplify access to every advanced configuration option your router supports.
Other common default gateways you may come across are 192.168.1.1 and 10.0.0.1, but 192.168.0.1 remains the most widely used across access points and broadband routers worldwide.
Default Logins for 192.168.0.1
The default logins printed on that sticker under your router are the same credentials millions of other people are using right now. Manufacturers ship devices with common credentials built in to make the initial setup straightforward. Here are the most widely used default username and password combinations:
| Usage % | IP Address | Username | Password |
|---|---|---|---|
| 43% | 192.168.0.1 | admin | admin |
| 20% | 192.168.0.1 | admin | password |
| 17% | 192.168.0.1 | – | admin |
| 7% | 192.168.0.1 | – | Admin |
| 4% | 192.168.0.1 | admin | – |
These login credentials get you past the login panel and into the full configuration access of your router. Authentication here is simple but critical once you are in, the entire network security of your home is in your hands.
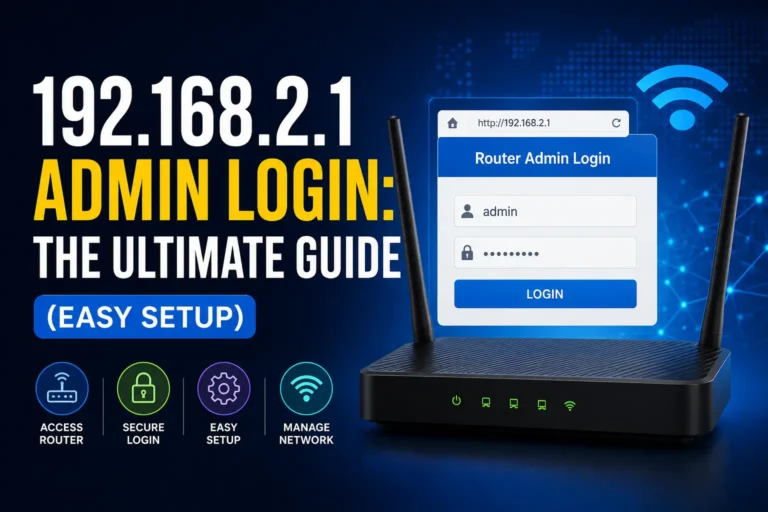
How to Login to 192.168.0.1
Getting into your router’s admin console is easier than most people think. Before you start, make sure your device is connected to the network either through an Ethernet cable plugged into one of the LAN ports or wirelessly through your WiFi signal.
Follow these steps:
- Open any web browser on your device.
- Type http://192.168.0.1 directly into the address bar not the search bar.
- Hit enter and the router login page will appear.
- Enter your username and password use the default logins from the table above if you have never changed them.
- Click OK or Login and you will land inside the config page.
- From here, managing your internet settings, tweaking advanced settings, or checking connected devices is straightforward.
If you get an error message at any point, it likely means 192.168.0.1 is not your router’s actual gateway. A forgotten password is also common in that case, the router manual or the default logins list can help you regain access before you even think about a reset.
If You Can’t Access 192.168.0.1
Hitting a blank page or an error when typing http://192.168.0.1 is frustrating. Here is how to fix it:
- Open the command line on Windows press Start, type cmd, and hit enter.
- Type ipconfig/all and look for the line labeled Default Gateway.
- Whatever address appears there is your router’s actual IP address use that instead of 192.168.0.1.
- If two devices on your network share the same private IPv4 address, it creates an IP conflict that makes the connection unpredictable. Make sure only one device is assigned to any given address in the network.
Forgot IP Address Username and Password?
It happens to everyone. You set a custom password months ago and now you are staring at the router login page with no idea what you typed. Here is what to do:
Step 1: Check the Manual
- Look at the router manual or the box it came in.
- The default username and default password are printed right there.
- If you never changed them, those original credentials will still work.
Step 2: Reset the Router If you did change the password and genuinely cannot remember it:
- Look at the back of your router for a small hidden reset button.
- Grab a needle or a paper clip.
- Press and hold that reset button for about 10 to 15 seconds.
- Release the router will revert all changes back to the default settings.
- Use the default logins to regain access and reconfigure from scratch.
Configure Your Router
Once you are inside the router settings, the real work begins. Here are the most important configuration options worth knowing:
Change Your Router’s Login Information
The very first thing to do after gaining access is update the default password. It is on the box, on the sticker, and listed on countless websites it is not a secret. Head into Settings, find the Reset Router Password option, type a new password, and save settings before logging out. The login process is nearly identical across brands whether it is the D-Link router login process or the TP-Link login process, the flow stays the same.
Change Your Router’s IP Address
- Access router settings through the URL bar using 192.168.0.1.
- Enter your login information.
- Go to Setup → Network Setup → Router Settings.
- Type a new IP address into the field and save.
Setting Up Parental Controls
There are two types of parental controls available on most routers:
| Type | What It Does |
|---|---|
| Filtering Parental Control | Blocks age-restricted content, sets a time limit on internet usage |
| Monitoring Parental Control | Lets you see what is happening online without blocking anything |
Both can be configured to suit your household. Testing different combinations is encouraged until you find what works.
Reset Your Router
Avoid pressing the physical Reset or Reboot button on the device it can trigger a full factory reboot of your modem. Instead:
- Unplug the router and modem from the power source.
- Leave them alone for about one minute.
- Plug them back in.
This soft restart clears temporary issues without wiping your configuration.
Update the Router’s Firmware
- Go to your router’s manufacturer website.
- Check whether a firmware upgrade is available for your model.
- Install it newer versions include security patches alongside performance improvements.
- When connecting any new device, always select Home as the network type.
What is the IP 192.168.0.1 used for?
Every internet-capable device that connects to your router receives a private IP address. Not just the laptop and smartphone, but also the printer, scanner, and gaming console. Here is how a typical home network assignment looks:
| Device | Assigned Private IP |
|---|---|
| Router | 192.168.0.1 |
| Laptop | 192.168.0.2 |
| Smartphone | 192.168.0.3 |
| Tablet | 192.168.0.4 |
These private IP addresses are how your wireless network routes specific data packages to the right device. The router pulls information from the internet and uses these addresses to deliver it accurately to the World Wide Web requests made by each device.
When you type 192.168.0.1 into a browser and reach the configuration interface, you are accessing the nerve center of your network. From the admin panel you can:
- Change WiFi credentials and network names.
- Adjust operator settings.
- Set up a guest network for visitors so they stay connected without ever seeing your main WiFi credentials.
- Check who is connected to the network at any given moment.
- View and install the latest firmware version.
- Close off bugs that intruders could exploit through security updates.
The username and password for the configuration interface are usually printed on a sticker on the router and repeated in the user manuals. If you type 192.168.0.1 and the router login page never appears, it likely means someone changed the default private IP in that case, a factory reset is the only reliable path back to full control over your network security.
Private vs. Public IP Addresses
Your router holds two kinds of addresses at the same time:
| Type | Assigned By | Needs to Be Unique |
|---|---|---|
| Public IP Address | Internet Service Provider (ISP) | Globally, across the entire internet |
| Private IP Address | Router (default: 192.168.0.1) | Only within your local network |
The Internet Assigned Numbers Authority IANA manages this system globally. They introduced IPv4, a 32-bit number expressed as four groups separated by a decimal point, which could accommodate roughly 4 billion addresses. As the internet expanded, that limit became a real problem, so IANA introduced the IPv6 standard, which supports a far larger number of combinations and solved the shortage.
To manage the gap in the meantime, IANA designated certain number blocks as private:
- There are approximately 17.9 million private IP addresses reserved exclusively for private networks.
- These addresses never appear on the public internet, so they do not need to be globally unique.
- A private address needs to establish an internet connection through an ISP before it can communicate with anything outside its own network.
Setting Up a Broadband Connection
Setting up a broadband connection to your router for the first time is straightforward:
- Take a standard Category 5 Ethernet cable and plug your DSL or cable modem into the port on the router marked Internet or WAN.
- Take a second Ethernet cable and connect your computer to one of the router’s LAN ports for a wired connection.
- If the router supports wireless, your iPhone or any other smart device can connect to the Wi-Fi signal directly no cable needed.
The router handles the network connection automatically once the setup is complete.
Router Username and Password List
Different router brands ship with different default credentials. Here is a reference table for 2WIRE routers:
| Brand | Model | Protocol | Username | Password |
|---|---|---|---|---|
| 2WIRE | HOMEPORTAL Rev. SBC YAHOO! DSL | (none) | 2Wire | (none) |
| 2WIRE | ALL WIFI ROUTERS | HTTP | (none) | Wireless |
Checking this kind of router list before attempting a login saves a lot of guesswork, especially on older brand models where the protocol and default login combinations vary more widely.
Changing Your Router’s Password
A strong password on your router is non-negotiable. The default password is publicly known and trivially easy to guess it offers almost no real network protection on its own. Here is how to update it:
- Log in to 192.168.0.1 using your current credentials.
- Find the admin tab inside the router settings.
- Look for the password change option.
- Type the new password twice the configuration prompts this for safety to prevent typos from locking you out.
- Save the changes.
Your wireless network is immediately better protected. This one update does more for router security than almost any other single configuration change.
How to Prevent Unauthorized Access to IP 192.168.0.1
Accessing the router administration interface requires a physical connection either through WiFi or a direct RJ-45 Ethernet cable plugged into a network socket. This means anyone who:
- Connects to your WiFi
- Finds an open network socket
- Gets hold of a device previously connected to your network
…could potentially reach the admin panel. Here is how to protect yourself:
- Change default passwords immediately. Generic credentials are compiled on public pages if the router model is visible on the login page, the matching username and password can be looked up in seconds.
- Keep the router out of reach of third parties. Anyone close enough to check the sticker has the access codes.
- Enable a firewall that limits access to specific IPs blocking the admin panel from being reached over WiFi adds another layer of protection.
- Restrict wired network access so unauthorized visitors cannot plug in and reach the administration interface.
A large number of people continue using default passwords out of convenience or simple ignorance, without realizing what a security breach that represents. Changing it is the single most important step you can take for router security.
How to Fix the Most Common 192.168.0.1 IP-Related Bugs
Check Your Gateway First
Open the Windows console and run the ipconfig command. Look for the Default Gateway field if it shows something other than 192.168.0.1, that is why you cannot reach the admin panel. The IP configuration may have been changed at some point.
Watch Out for Font Confusion
IP addresses use numbers and dots only. In certain fonts:
- The number 0 looks like an uppercase O
- The number 1 looks like a lowercase l
Typing 192.168.0.l instead of 192.168.0.1 sends you nowhere. Double-check every character before assuming something deeper is broken.
Understanding the 169.254.X.X Problem
If your device shows an IP starting with 169.254.X.X instead of 192.168.X.X, the DHCP server could not assign a valid address. Here is what happens:
| Protocol | Role | Address Range |
|---|---|---|
| DHCP (Dynamic Host Configuration Protocol) | Automatically assigns IPs to connected devices | 192.168.0.X |
| APIPA (Automatic Private Internet Protocol Addressing) | Takes over when DHCP fails | 169.254.0.1 – 169.254.255.254 |
The APIPA address range is a dead end for internet access.
Fixing the Problem
- On a cable connection:
- Check that the router is powered on.
- Make sure the cable is securely connected at both ends.
- Ensure the cable is undamaged and properly crimped.
- Use different tools to test the cable’s condition if unsure, replace the cable.
- On a WiFi connection:
- Restart the network first.
- If the problem persists, DHCP may be disabled in the router settings.
- Manually configure an IP address on the computer to restore the internet connection.
Sorting out these bugs whether related to the address range, a DHCP server issue, or a simple crimping problem is how you keep the network functionalities running cleanly and maintain the WiFi performance that makes everything else work.
FAQs About 192.168.0.1 Admin Login
Q1.
Q2. How to log in to 192.168.0.1? Type 192.168.0.1 in your browser’s address bar, enter your username and password, and click OK or Login. That is all it takes to reach the router login page and get into your config page.
Q3. What are the most common default logins for 192.168.0.1? The most common default login credentials for 192.168.0.1 are:
- Username: admin
- Password: admin
Q4. What is the most common default username for 192.168.0.1? The most common default username for the 192.168.0.1 address is admin.
Q5. What is the most common default password for 192.168.0.1? The most common default password for the 192.168.0.1 address is admin.
Q6. How to Access Router IP Address 192.168.0.1? Type 192.168.0.1 in your browser’s address bar, enter your username and password, and click OK or LOGIN. The most common default logins to access 192.168.0.1 are username: admin and password: admin.
Q7. I cannot access the web management page?
- Make sure you are typing the correct IP address some routers use a different gateway IP address instead of 192.168.0.1.
- Try a different browser and attempt access again.
- Restart your router, wait a few seconds, then try again.
- Check that the router’s LAN port is correctly plugged in with the modem’s cable.
- Make sure you are not typing 192.168.o.1 that is an invalid IP address. Only numbers and dots belong in the URL.
Q8. I cannot access the internet after setup – what is wrong?
- Check whether you have an active data plan or if your monthly data quota has been exceeded.
- If your connection type is PPPoE, contact your internet service provider for the correct username and password without these details it will not connect.
- For a Static IP connection, enter the details exactly as specified by your ISP.
- If you replaced an old router but kept the same internet connection, add the old MAC Address into the new setup. Find it under Internet Network in the Advanced panel and enter it in the Use Custom MAC Address field.
Q9. How can I change my default Router IP address? For security reasons, it is recommended to use a customized router IP address. Here is how to do it on the most common brands:
| Brand | Steps |
|---|---|
| TP-Link | Login to web interface → Advanced → Network → LAN → Change IP Address field → Save |
| D-Link | Access admin panel → Setup Tab → Network Settings → Router Settings → Router IP Address → Save Settings |
| NetGear | Login to NetGear Genie → Advanced → Setup → LAN Setup → LAN TCP/IP Setup → IP Address → Apply Changes |
Once the gateway IP address is changed, your router will restart automatically to save the applied changes.